~ 12 min read
Integrating Django with Tailwind CSS

Django - the modern day web framework
Django is a well known, well used full-stack web framework for the Python language. At the time of writing is enjoys 66.2 k stars on GitHub reflecting it’s popularity. As a high-level web framework it encourages rapid development by presenting an opinionated and highly structured development environment. This makes it easier for the developer, even those without much programming experience, to get started with their web app designs without spending any time worrying about the inner workings of full stack applications. You have the freedom to get on with the job of creating your web app and rapidly creating useful content and functionality.
Django is fast, secure, scalable, and used over a huge variety of websites and apps.
Django ORM
Django comes equiped with an object-relational mapper (ORM) with which you can design your database layout - still using Python code.
from django.db import models

class Reporter(models.Model):
    full_name = models.CharField(max_length=70)

    def __str__(self):
        return self.full_name

class Article(models.Model):
    pub_date = models.DateField()
    headline = models.CharField(max_length=200)
    content = models.TextField()
    reporter = models.ForeignKey(Reporter, on_delete=models.CASCADE)

    def __str__(self):
        return self.headline
Accessible API
The Django ORM can in turn can be accessed and queried “on the go” with the Python API that is also shipped with Django.
# Import the models we created from our "news" app
>>> from news.models import Article, Reporter

# No reporters are in the system yet.
>>> Reporter.objects.all()
<QuerySet []>

# Create a new Reporter.
>>> r = Reporter(full_name='John Smith')

# Save the object into the database. You have to call save() explicitly.
>>> r.save()
Admin interface included
Once your data layer models are defined, Django will automatically create a production ready administrative interface; that is, a website that allows authorized users to add, change and delete objects. Thus with an admin site ready and working with very little effort, developers can move quickly to populate the wider app with data. And then independently, others can begin building HTML templates to present that data to the user on the frontend.
URL Schema
Django encourages clean and elegent URL designs for your app - allowing your routing to be created efficiently, free of errors, directing users to your content. The ability to capture values directly from the URLs themselves gives you endless functionality to deal with user page requests.
from django.urls import path

from . import views

urlpatterns = [
    path('articles/<int:year>/', views.year_archive),
    path('articles/<int:year>/<int:month>/', views.month_archive),
    path('articles/<int:year>/<int:month>/<int:pk>/', views.article_detail),
]
Views and Templates
Together, Django views and templates allow you to deal with HTTP requests, retrieve any necessary data from your ORM, and then present the requested page to the user with the template hydrated by the correctly fetched data. Django uses a template search path, which allows you to minimize redundance among template designs. Indeed you can define a base level HTML template and then reuse this across any other templates - e.g. to create a consistent Navbar across your web app. Finally you can dynamically add data to the template through the use of double curly brace template tags and filters. Thus allowing templates to take on more dynamic roles in response to user requests and data changes.
Tailwind - the rising star CSS framework
The TailwindCSS framework is rapidly becoming the first choice for styling websites and web apps. It currently enjoys 60.5 k stars on GitHub reflecting it’s huge popularity.
Tailwind is fast, flexible, and reliable - with zero-runtime.
Tailwind works by scanning your project’s HTML files, script files, components, and (importantly for us) any other templates that may contain class names. With this, it will then generate the corresponding styles and output those to a static CSS file.
Utility first
By “utility first”, TailwindCSS provides pre-existing classes for you to place directly into your HTML. In this way you aren’t necessarily required to have a dedicated CSS stylesheet - and can certainly begin to cut back on multiple CSS stylesheets and any confusion they introduce. This approach allows you to implement completely custom component design that can be completely self-contained in the HTML. It also means you aren’t wasting time organising multiple stylesheets or inventing class names - instead you just get on with styling your webpage.
Easy configuration
Since TailwindCSS is a framework first and foremost, it provides a configuration file and CLI that allow the developer to create bespoke themes for each project. Right from the start the idea is for customization of your designs to be easily implemented. You can fully customize the Tailwind framework to match your desired brand and/or theme - with further style customization being the natural extension of this. In turn, TailwindCSS encourages resusable abstractions of styles thereby reducing (or at least managing) CSS duplication.
Background development server
Behind the scenes, the npm Tailwind development server watches for changes to any of your class names, and implements these changes live as you work.
Django and TailwindCSS - project setup
Let’s get started integrating these two frameworks so that they can work together. At face value the complexity comes from combining a Node/npm library (TailwindCSS) with a Python web-framework (Django). That is to say, combining a framework more often associated with Node/JavaScript web design alongside a Python framework for whose specific libraries and ecosystem distinguish it from the world of Node/JavaScript altogether. Of course, the two main Python libraries we’ll be using (Django and Django-Tailwind) are able to deal with this, as we’ll see.
Python and npm Installation
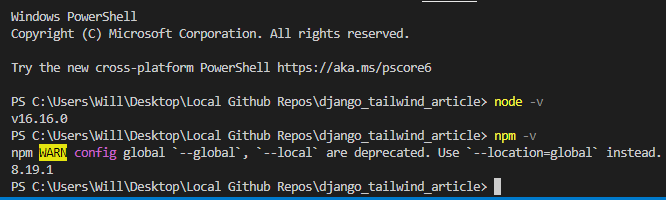
The Node Package Manager (npm) is the standard package registry for the vast majority of JavaScript and Node packages used in modern web development. Meanwhile, Node is the JavaScript runtime most often used to run server side JavaScript on Chrome’s V8 JavaScript engine. Both Node and npm can be installed by using the Node installer at their dedicated site. Once you install Node on your system (with npm being installed automatically alongside) you can check to make sure they have been installed correctly with the commands:
node -v
npm -v
Virtual Environment Setup and Package Installation
It’s best practice to create a virtual environment such that your local machine and your project don’t interfere with one another. My preferred method is the Virtualenv project. Thus, working from the VS Code terminal, from within our project directory, we create a new virtual enviroment named myenv as follows:
virtualenv myvenv

We activate the virtual environment with the command .\myvenv\Scripts\activate, which should change your prompt to reflect the fact you are now inside your new virtual environment.

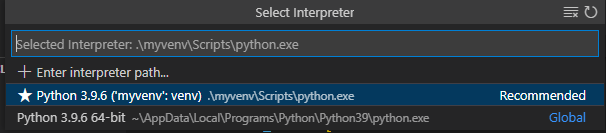
It’s also necessary to manually ensure a Python interpreter has been selected - for the benefit of VS Code. Thus press Ctrl + Shift + p to bring up the “Select Interpreter” menu.
And so now we can install the Django Python package.
pip install Django==4.1.1
Django setup
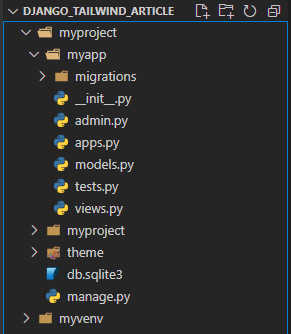
Start a new Django project, with django-admin startproject myproject. I’ve chosen to name my project myproject but of course feel free to use whatever name you wish. Upon completion you will notice that a new directory structure has been created automatically by Django for you. This is the parent Django project structure, such that any other Django apps you create later on will be subservient to this parent app.
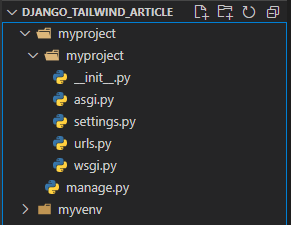
If you now change directories into your project folder (cd myproject) you will be able to complete the setup by making use of the provided manage.py file present in each Django project.
Django-Tailwind setup
Configure Django with Tailwind by following the instructions at Django-Tailwind - but - following the order as below:
-
Install the Django-Tailwind package with
python -m pip install django-tailwind. -
Add
'tailwind'toINSTALLED_APPSlisting inmyproject/settings.py:INSTALLED_APPS = [ # Other Django apps ..., 'tailwind', ] -
Create a Tailwind CSS compatible Django app. Change directories into the
myprojectfolder (wheremanage.pyis situated) and run the commandpython manage.py tailwind init. Since this is for the benefit of Tailwind, i.e. CSS styling, it usually makes sense to call itthemeso, at the prompt, enter the nametheme. Upon doing this you will see a new folder appear within your existing Django project. This folder will contain thethemeDjango app.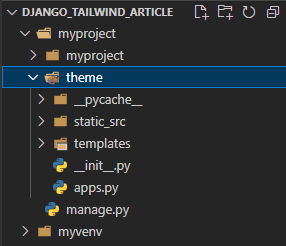
-
We now need to register this new
themeDjango app by adding it toINSTALLED_APPSinmyproject/settings.py:INSTALLED_APPS = [ # Other Django apps ..., 'tailwind', 'theme' ] -
Register the generated
themeapp by adding the following line tomyproject/settings.pyfile (right at the bottom of themyproject/settings.pyfile):TAILWIND_APP_NAME = 'theme'. -
Also, add the
INTERNAL_IPSlist to themyproject/settings.pyfile, again right at the bottom, ensuring that it contains the127.0.0.1 ipaddress.INTERNAL_IPS = [ "127.0.0.1", ]
NPM setup
Now we ensure that NPM, which is a Node/JavaScript executable, can be accessed and used in our development environment. Thus, we must configure the path to the npm executable. On a Windows machine, use the built-in command prompt and type where npm to find out where NPM was installed earlier. Then, copy the full path to this npm.cmd executable and place that full path into the myproject/settings.py file, again right at the bottom: NPM_BIN_PATH = r"C:\Program Files\nodejs\npm.cmd".
Tailwind automatic reloading
When we are in our development environment we’ll find it very useful to have the browser automatically refresh for us whenever we make any changes to our project. The development server provided by Django does this for us in respect of changes we make to Django. But for TailwindCSS changes i.e. addition or removal of CSS classes from our HTML templates, we need to manually enable this same browser reloading functionality. To do so we add django_browser_reload to INSTALLED_APPS in myproject/settings.py:
INSTALLED_APPS = [
    # Other Django apps
    ...,

    'tailwind',
    'theme',
    'django_browser_reload',
]
Middleware
Add the middleware to the MIDDLEWARE section of the settings.py file:
MIDDLEWARE = [
    # ...
    "django_browser_reload.middleware.BrowserReloadMiddleware",
    # ...
]
The middleware should be listed after any others that were placed there by the installation of Django, that is it should be listed after any other middleware that encode the response, such as Django’s GZipMiddleware. The middleware automatically inserts the required script tag on HTML responses before </body> when DEBUG is True. In addition, include django_browser_reload URL in myproject/urls.py, which is your root URLconf. Also, here, don’t forget to import the include function:
from django.urls import include, path

urlpatterns = [
    path('admin/', admin.site.urls),

    path("__reload__/", include("django_browser_reload.urls")),
]
Install TailwindCSS itself
Install the TailwindCSS framework itself, and it’s dependencies, by running the following command - as before at your command prompt in VS Code you should be in the myproject directory, where the manage.py file is situated: python manage.py tailwind install. Behind the scenes this will run the npm install tailwindcss and npx tailwindcss init commands.
TailwindCSS in Django
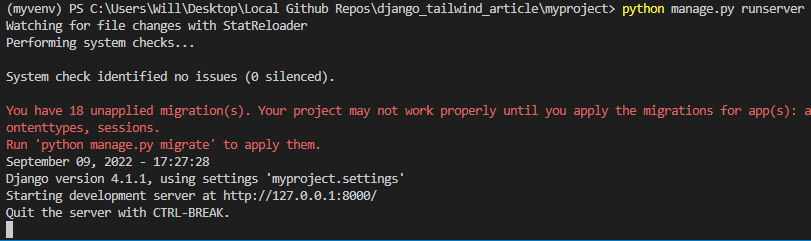
Start your development servers
With the above setup complete you should now be able to use TailwindCSS classes in your Django HTML templates. As I’ve mentioned above, we have development servers available for both Django and TailwindCSS to ensure the browser automatically refreshes whenever we make any changes to our files/work.
Ensure you have two terminal prompts available, and that you have changed directories in both to be located in your root project folder i.e. myproject/ here. Then, in one of those terminals start the TailwindCSS development server with python manage.py tailwind start … while in the other start the Django development server with python manage.py runserver.

Create a new Django App
We can now begin developing our Django project in exactly the same way as we would normally. Start by creating a new Django app with python manage.py startapp myapp.
Add the name of your new app (e.g. myapp in this case) to your root myproject/settings.py file:
INSTALLED_APPS = [
   # Other Django apps
   ...,

   'tailwind',
   'theme',
   'django_browser_reload',

   'myapp',
]
Also, add the routing to your root URLconf in myproject/urls.py:
from django.urls import include, path

urlpatterns = [
    path('admin/', admin.site.urls),

    path("__reload__/", include("django_browser_reload.urls")),

    path('', include('myapp.urls')),
]
Add templating
For templating, create a new folder called templates inside of the myapp folder. And then, inside of templates create another new folder named myapp. Finally create an empty file named index.html inside templates/myapp. Now, inside of myapp/views.py we’ll add the view for the above index.html file.
def index(request):
    text = 'Hello World!'
    context = {
        'context_text': text,
    }
    return render(request, 'myapp/index.html', context)
Back inside the myapp folder, create a urls.py to store your URLconf. Inside there we define the following:
from django.urls import path
from . import views

urlpatterns = [
    path('', views.index, name='index'),
]
Finally we add some html to our index.html:
{% load tailwind_tags %}
<!DOCTYPE html>
<html lang="en">
  <head>
    <meta charset="UTF-8">
    <meta http-equiv="X-UA-Compatible" content="IE=edge">
    <meta name="viewport" content="width=device-width, initial-scale=1">
    <title>Django Tailwind Example</title>
    {% tailwind_css %}
  </head>
<body>
  <h1>{{ context_text }}</h1>
</body>
</html>
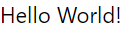
Notice here we have added two new Tailwind specific tags to our HTML template, namely {% load tailwind_tags %} at the top of the template and {% tailwind_css %} inside the <head> tag. Given that you’ve already started the Django development server you should be able to visit http://localhost:8000/ and see the HTML displayed.
Add TailwindCSS Styling
Head back to your HTML template (myapp/templates/myapp/index.html) and add some TailwindCSS styling to the <h1> tag to show that everything is working as expected:
{% load tailwind_tags %}
<!DOCTYPE html>
<html lang="en">
<head>
<meta charset="UTF-8">
<meta http-equiv="X-UA-Compatible" content="IE=edge">
<meta name="viewport" content="width=device-width, initial-scale=1">
<title>Django Tailwind Example</title>
{% tailwind_css %}
</head>
<body>
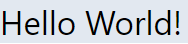
<h1 class="text-2xl bg-slate-200 hover:bg-yellow-400">{{ context_text }}</h1>
</body>
</html>
And so you should be able to see the new styling applied:
Conclusion
So, there you have it - Python Django web framework working with TailwindCSS framework - and with development servers for both frameworks updating live as we make changes to our project!